The Leadbox was built with many options and customizations to mirror your brand and your conversion goals on your website. Let's look at the options you have including the website buttons, colors, logo, content, calls to action, icons and more.
The Leadbox customizable features include:
Headline text
Logo
Color
Calls-to-actions (CTAs): logos & words
Text-only vs. multi-channel
Multi-channel mode is activated with the toggle Text Only or Channels under Leadbox > Channels > Leadbox mode. Also, if you've chosen to display in the Leadbox in another language, please make a change to the profile language.
Headline text
Guide your website visitors on how to interact with your Leadbox. Click the pencil icon to the right of the Leadbox Preview and then edit the content in the upper part of the Leadbox. You are able to use <strong></strong> tags to bold content. The character max for this intro content is 65 characters.
Logo and accent color
Your Leadbox should match your website and brand. You can change the accent color of the Leadbox and the logo/image displayed by clicking on the pencil icon just to the right of the Leadbox preview.
Edit the Leadbox
Sign in and go to Leadbox from the left navigation. The Leadbox preview will open. Note if you have multiple profiles, you'll be able to edit each profile by selecting from the profile switcher at the top of the page.
To the right of the Leadbox preview is a pencil icon. Select the pencil icon. The headline text becomes editable and a camera icon overlays the logo section.
Edit the headline text and note that using HTML to bold (
<strong>or<b>) or add italics (<i>) doesn't increase the allowed characters (65).Edit the color and logo by selecting the logo / camera overlay. A modal will appear with logo upload and color choices. Note colors are automatically suggested from your logo.
Select Update to confirm your color and logo choices.
Select the ✓ to save changes to the headline, color, and logo. A confirmation appears for the save action.
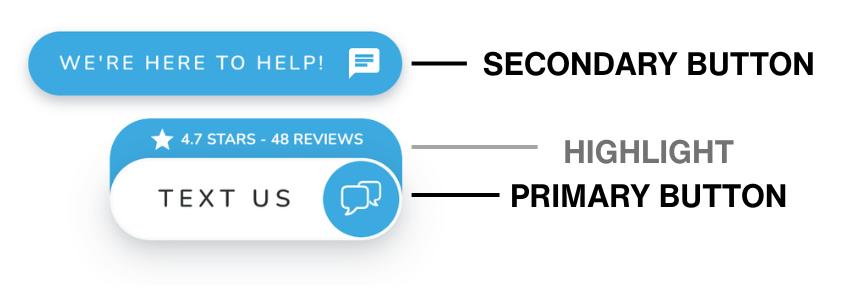
Call-to-action buttons
There are two editable CTAs: the primary CTA and the secondary CTA. The secondary CTA flies in after the initial page load and is dismissible by the site visitor.
Additionally, if using a multi-channel Leadbox configuration, each channel has a corresponding button with editable text, icons, and colors.
Primary CTA
The Primary CTA is always visible on any screen, desktop or mobile. The Primary button has the following options for display:
Button with icon and text or icon only
Text display options of Contact, Text Us, or Message.
Two icon options of a double chat bubble icon or mobile phone icon
Screen location of bottom right (default) or bottom left
If you'd like to add an additional message to the Primary CTA, please check out the Highlights feature.
Secondary CTA
The Secondary button appears above the Primary button, sliding in from the side of the screen 3 seconds after the page loads to attract attention. It has a wider set of options when creating your call to action allowing you to use any combination of words up to 20 characters combined with 22 icons.
Highlight
To update your primary call-to-action with a Highlight, follow these steps:
Go to the Leadbox screen in your profile on the web app. The Leadbox options open and preview loads.
In the Buttons section (bottom), hover on the Primary button and select the pencil icon to edit. The Edit Primary Button dialog opens.
Toggle Highlights on. The types will now be selectable.
Select the Highlight type: Reputation, Average reply time, or Custom. Depending on the type, you'll be given the choice of a rating & reviews, reply times, or a plain text box.
Complete the Highlight information and select Save. The Leadbox will update on your site immediately. Note the Leadbox preview doesn't yet update.
Note a primary button that is has Button only toggled will not display a highlight. The primary button must display With text toggled.
Edit CTAs
Sign in and go to Leadbox from the left navigation. The Leadbox preview will open. Note if you have multiple profiles, you'll be able to edit each profile by selecting from the profile switcher at the top of the page.
Mouse over the CTA section on the left side of the screen. For each CTA section (both primary or channels), there's an edit pencil icon that appears on mouseover.
Select the pencil icon next to the CTA. A dialog box will open.
Edit the color, button text, and logo associated with the CTA.
Note you may also edit the side the Leadbox and initial CTA appears when editing the primary CTA. Additionally, you may toggle between With Text or Icon Only for the primary CTA to customize its look and feel on your site.
PRO TIP: Use "Text" in one of the buttons. You want to market that you offer the ease of text messaging with your Leadbox buttons.
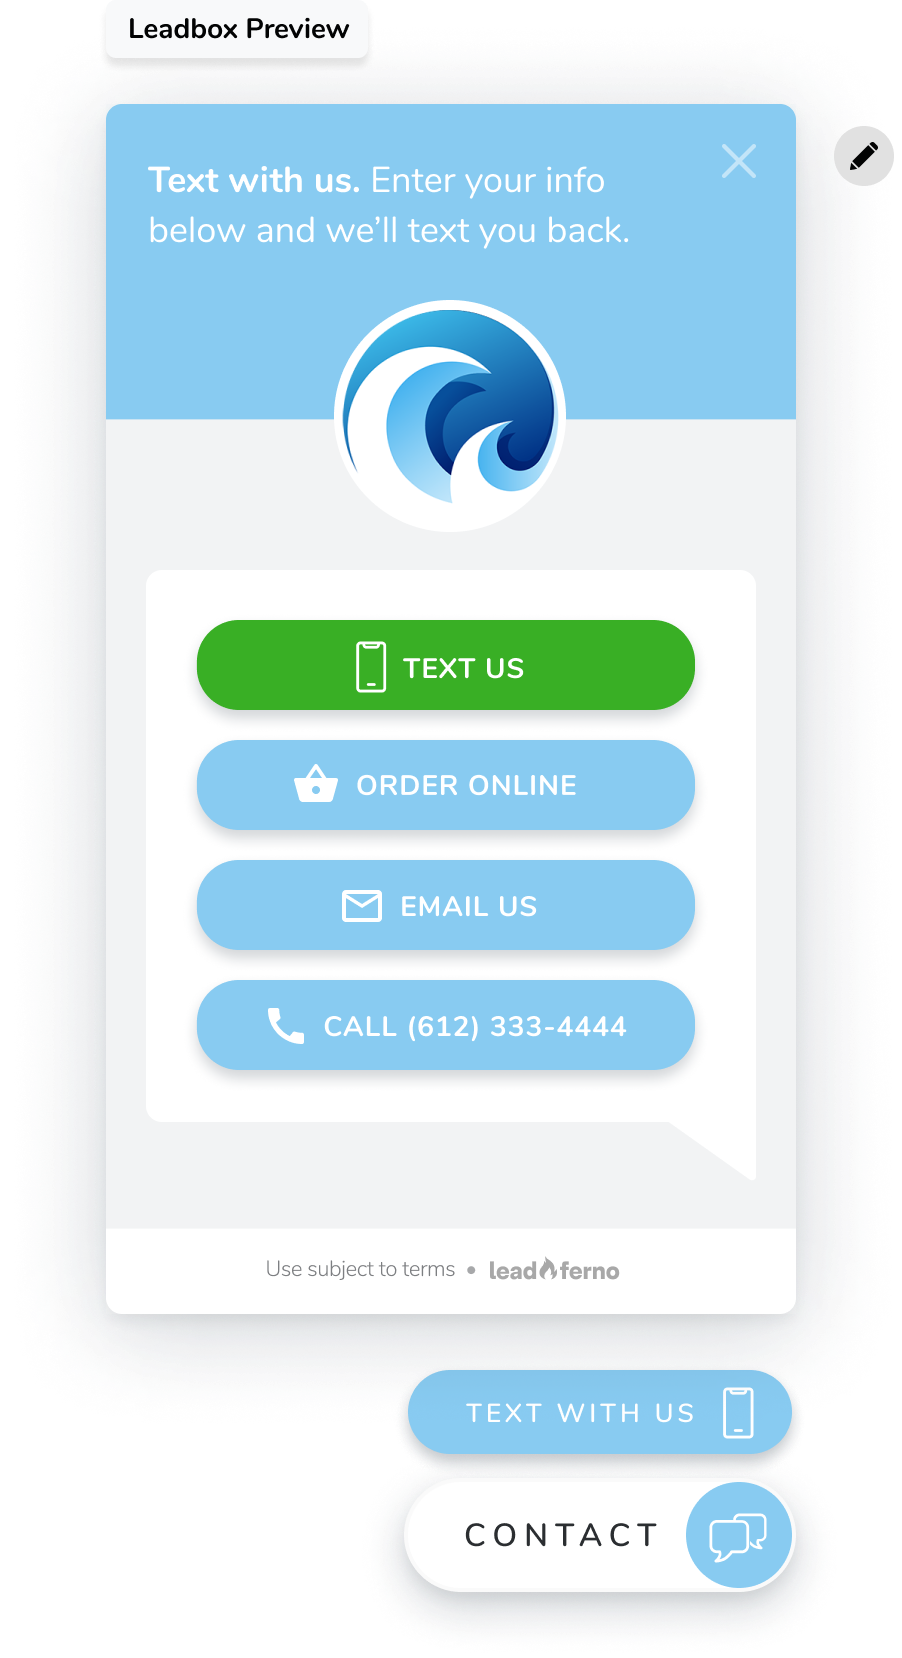
Setting the Leadbox mode
Text only mode
Text only mode is the most direct path for website visitors to start a text conversation with you. Once a user clicks a Primary or Secondary button on the website to open the Leadbox they are presented with a simple form to complete their name, mobile number and message. This starts the text conversation.
Channels mode
When you use "Channel mode", you are able to add up to four (4) calls to action including the "Text Us" channel that we automatically include and anchor to the top of your channel choices displayed in the Leadbox.
Channel types
Custom channels
A custom channel allows you to link to any URL, on your website or other websites. It is commonly used to link to existing lead forms, contact forms, email newsletter sign-ups, scheduling tools and payment links.
Call channel
This displays a phone number and can use click to call code for services like CallRail and Call Tracking Metrics.
Add a channel
Select the orange + icon next to the Channels header. A modal will open.
Select the channel type (custom or call). The field options will populate.
Complete the fields and options for that channel.
Select Save and the modal will close with an update to the Leadbox preview.
Edit / Delete a channel
Edit a channel by hovering over the channel and selecting the pencil icon. Also, you may delete a channel by mousing over the channel and then selecting the trash can icon to the right.
Note, to order the channels, simply delete and recreate them in the desired order. The last created channel will appear last in the Leadbox.